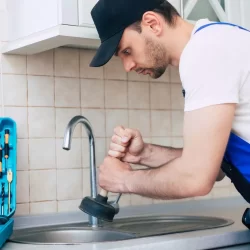
Performing a copper pipe repair without soldering saves time and limits the chance of accidents. To repair a leaky copper pipe it is easy when using the best tools and techniques. Here at Optimised Plumbing Services our Emergency Plumber team are the best at resolving leaking copper pipes. With over 20 years of experience, we provide quality help with repairing a copper leaking pipe. To perform a copper pipe repair without soldering there are many steps to follow:
- Pinpoint where the leak is from the piece of pipe
- Cut a hole into the ceiling to access the pinhole leak
- Turn off the water supply and cut the old pipe
- Install the SharkBites onto the new pipe
- Have the new copper pipe installed into the current plumbing system
- Turn the water back on again and inspect for any leaks

Repairing the Copper Pipe
Tools
A copper water pipe which needs to be repaired without soldering will need many tools. These can be purchased from the local hardware store. Also, these tools are great to keep if future copper pipe repairs are needed:
- SharkBite Couplings
- New Copper Pipe
- AutoCut Copper Pipe Cutter
- Tube Cutter
- Deburring Tool or Tube Cutter
- Sandpaper or Emery Cloth
- Utility Knife
- Drywall Saw
- PEX
- Sharpie/ Marker
Safety
There are a number of safety precautions to take when repairing a copper pipe. Here are the main precautions to follow:
- Wear gloves and safety goggles
- Handle all sharp tools carefully
- If there is a sudden extreme leakage, make sure the water is turned off and call for an emergency plumber
If any pipe bursts, read our blog on ‘5 steps to take when a pipe bursts’ for easy ways to fix it.
Spotting the Location of the Leak
- Mark the leak and cut a small hole within the ceiling where the water was coming out. Check to see where it is mushy before drilling the hole
- Saw with a drywall saw a square or rectangle in the ceiling to look for where the water was leaking from
- Cut out a larger hole if needing more room to access where the leak is
- There are many places, such as a copper pipe leaking right through where the joist (or timber) is, where it could be
Preparing for the Repair
- Turn off the water supply to the home and flush out the remaining water at the lowest point. Ensure to flush both hot and cold lines until no more water pours out of the tap
- Gather the SharkBite fittings, ½ inch by ½ inch repair coupling. These help to splice the copper pipe with a piece of PEX. This needs to be the same size as well and the end of it needs to be square
- Cut the pipe by using an auto-cut tool, it is the easiest tool to handle. Place the tool around the pipe, then turn it in the direction of the arrow which is on the tool. Cut the sections where the copper pipe is visibly damaged, for example where there are holes within them.
- Once the copper pipe has been cut, drain the rest of the water into a bowl, bucket or similar object
- Remove the cut pipe from the drain lines
- If a pipe repair has already taken place and SharkBite fittings are installed then removing the old pipe is different. Using a SharkBite removal tool, press it against the current SharkBite and pull the old pipe out of the SharkBite.
Cutting the New Pipe
- Ensure to purchase a replacement pipe that is the same width as the old one while being a newer model. The inner wall should be a little bit thicker than the previous pipe as well
- Using the deburring tool or pipe cutter, or utility knife, deburr the copper pipe by turning it within the inside. This is to make a small depression within the new copper pipe
- Use the sandpaper or emery cloth to smooth out the pipe after it has been cut. This is to also clean it of any copper shavings within or outside the pipe
- Mark with a marker one inch from the end of the copper pipe and slide on the new SharkBite
- If a PEX pipe is being installed, use the tube cutter to cut the edge to square it off. Mark one inch from the PEX pipe edges for it to eventually be installed
Installing the New Pipe
- With the old pipe in the ceiling mark on inch as well from the edge
- As with the new copper pipe, clean and deburr the ceiling pipe with the deburring tool or utility knife. Also, use the emery cloth or sandpaper to smooth out the edge and remove excess shavings
- Slide on the SharkBite fitting onto the current copper pipe. It should be one inch down the pipe and right against the mark
- Install the new pipe and ensure that both ends are properly tightened within the SharkBites. Know that if the new pipe spins that this is fine
Final Tests
- Use a flashlight or phone to inspect if the pipe has been successfully installed within the SharkBites
- To see if the repair has stopped the leak, start by turning the water on slightly and inspect for leaks
- If there are no leaks, turn the water back on completely and inspect the newly installed pipe throughout the day
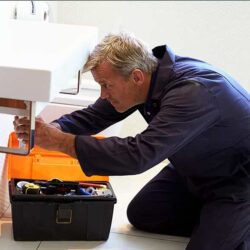
Reliable Copper Pipe Repair
When needing professional help on a copper pipe repair Optimised Plumbing Services is perfect for helping. Our plumbers will arrive fast and quickly repair any broken or leaky copper pipe. We can work in any property and on any plumbing system to fix a copper pipe.
Our fully qualified plumbers can perform copper pipe repairs anywhere in Sydney, such as the Hills District and South Sydney. We are also Blocked Drain specialists and can be contacted at any time to handle and resolve these frustrating situations.
For expert copper pipe repair services – contact Optimised Plumbing Services on 02 8074 1475 or at contact@optimisedplumbingservices.com.au!
Plumbing Specials and Offers!


Why Choose Us Over Other Plumbing Companies?
Same Day Service Guarantee

24/7 Emergency Service
Upfront and Honest Pricing

Quality Workmanship

We clean up after ourselves